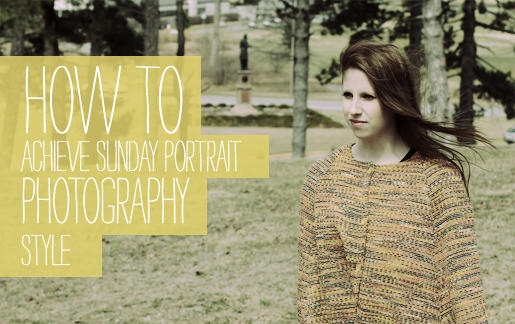
I wanted to do a little tutorial on how I achieve my Sunday Portrait photography style. I’ve been getting a lot of questions about this, so I thought I’d share. What you’ll need is a photo and Adobe Photoshop. I currently jump around from using CS4 at home and CS5 at work, so I believe the steps would be the same for all versions. You can also try using Photo to Sketch AI free for a fun and creative photo.
This tutorial uses a form of cross processing to achieve the desired look. Cross processing is another way of saying “you developed it wrong” if you were actually using film and chemicals to develop.
*Keep in mind each photo may need minor adjustments based on the quality of the original photo, but you get the idea. Also know that this tutorial will probably require some basic understanding of Photoshop, the layer’s palette, and adjustment layers.
Let’s get started! (CLICK ALL IMAGES TO ENLARGE TO FILL ENTIRE SCREEN!!)
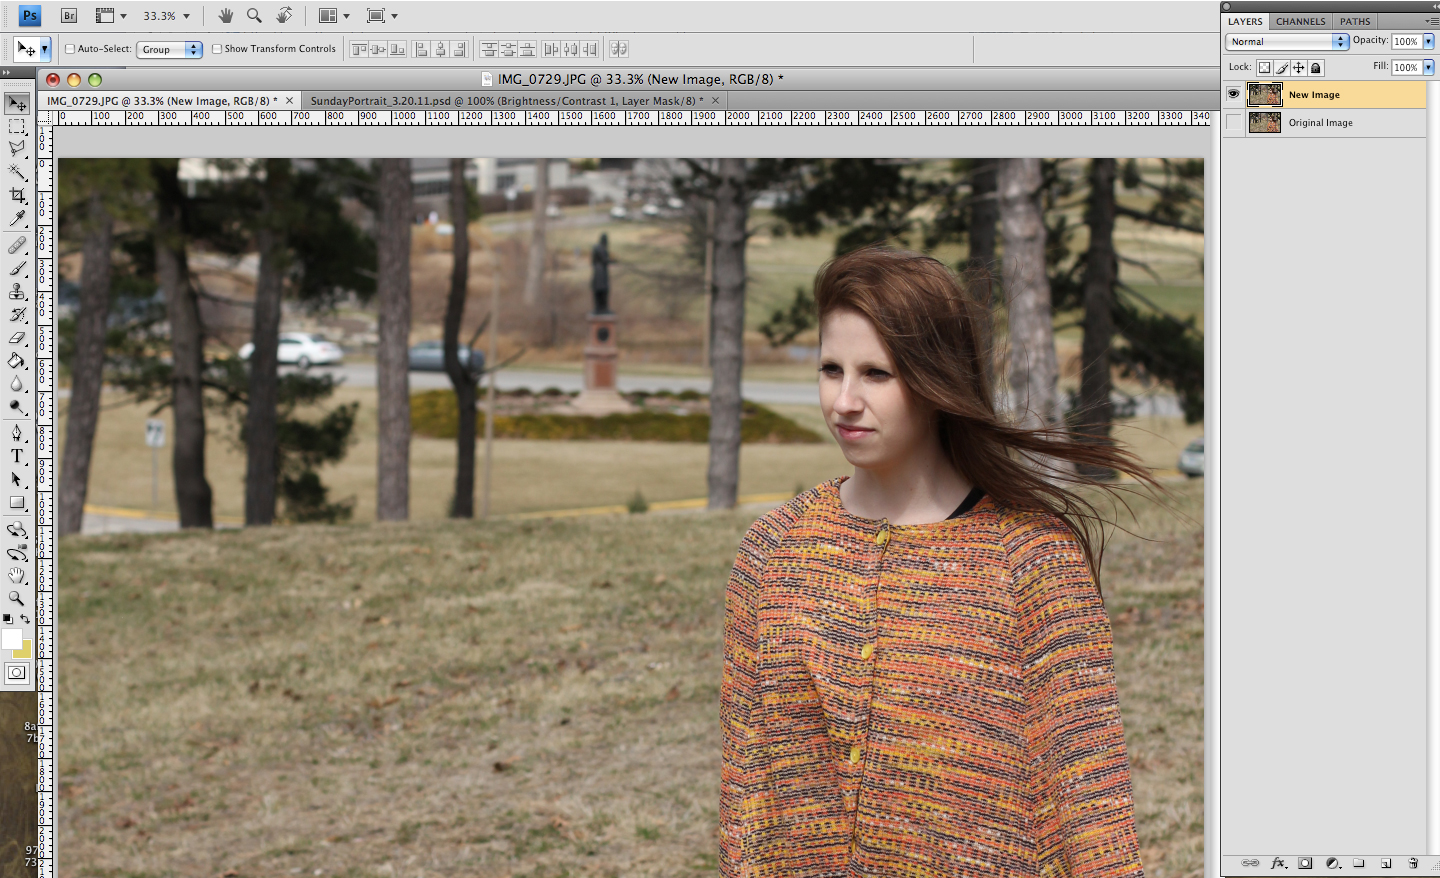
1. First open you uploaded photo from your camera to Photoshop. I then immediately re-save the image with a new name. (ex: portrait_retouched.psd) I then always make a duplicate layer in the layers palette so I always have the original layer to work with.
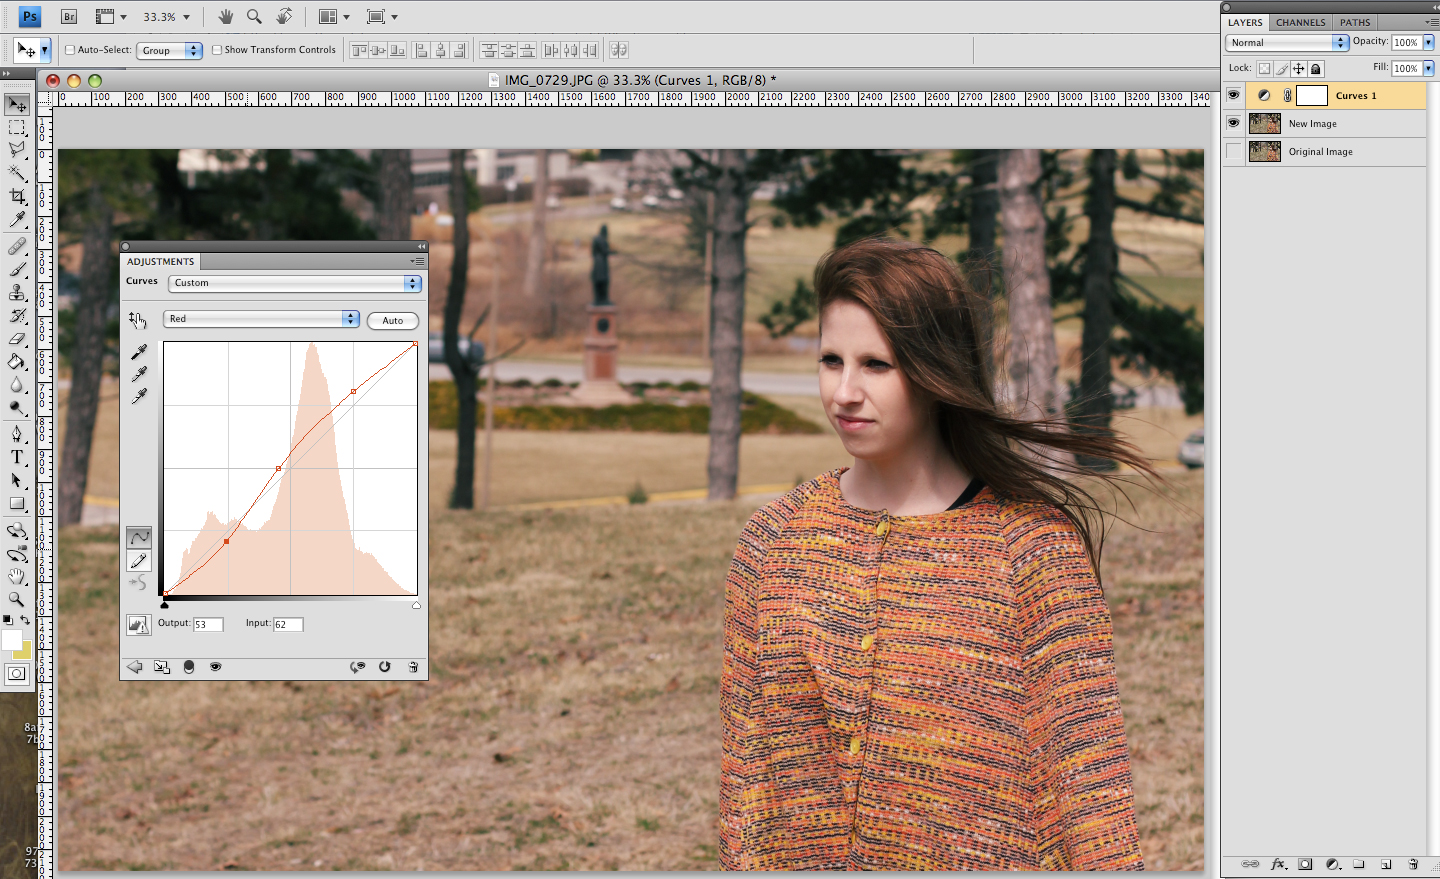
2. Once you have a duplicate layer made, click the “create new fill or new adjustment layer” icon in the Layers palette and select Curves. From the Channel drop-down box, select the red channel and drag the top right of the curve a little to the left. Then drag a couple of points on the curve so the curve looks like an gentle “S”. (this will darken the shadows and brighten the reds in the image)
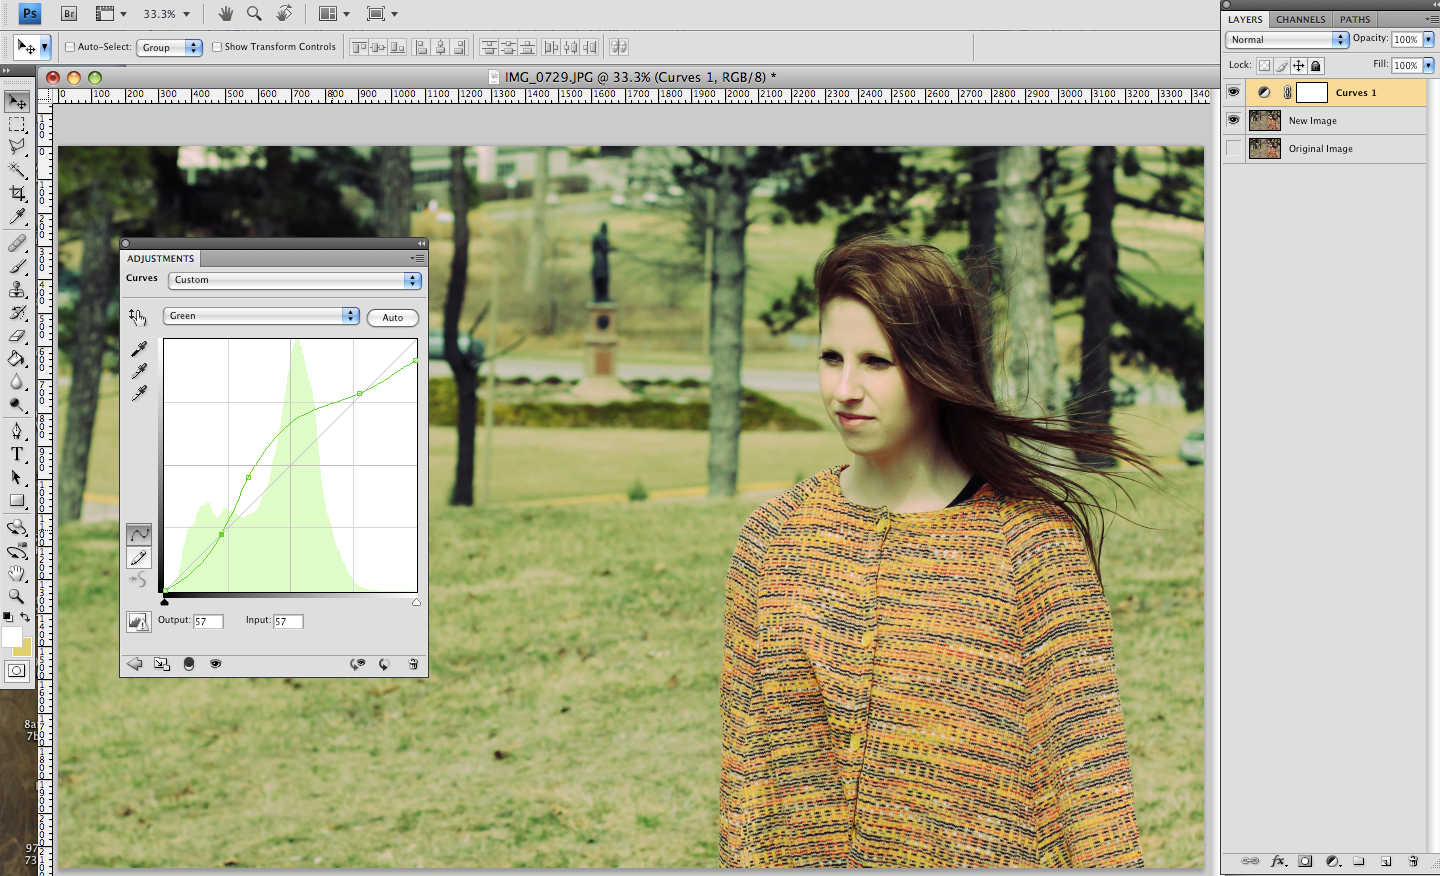
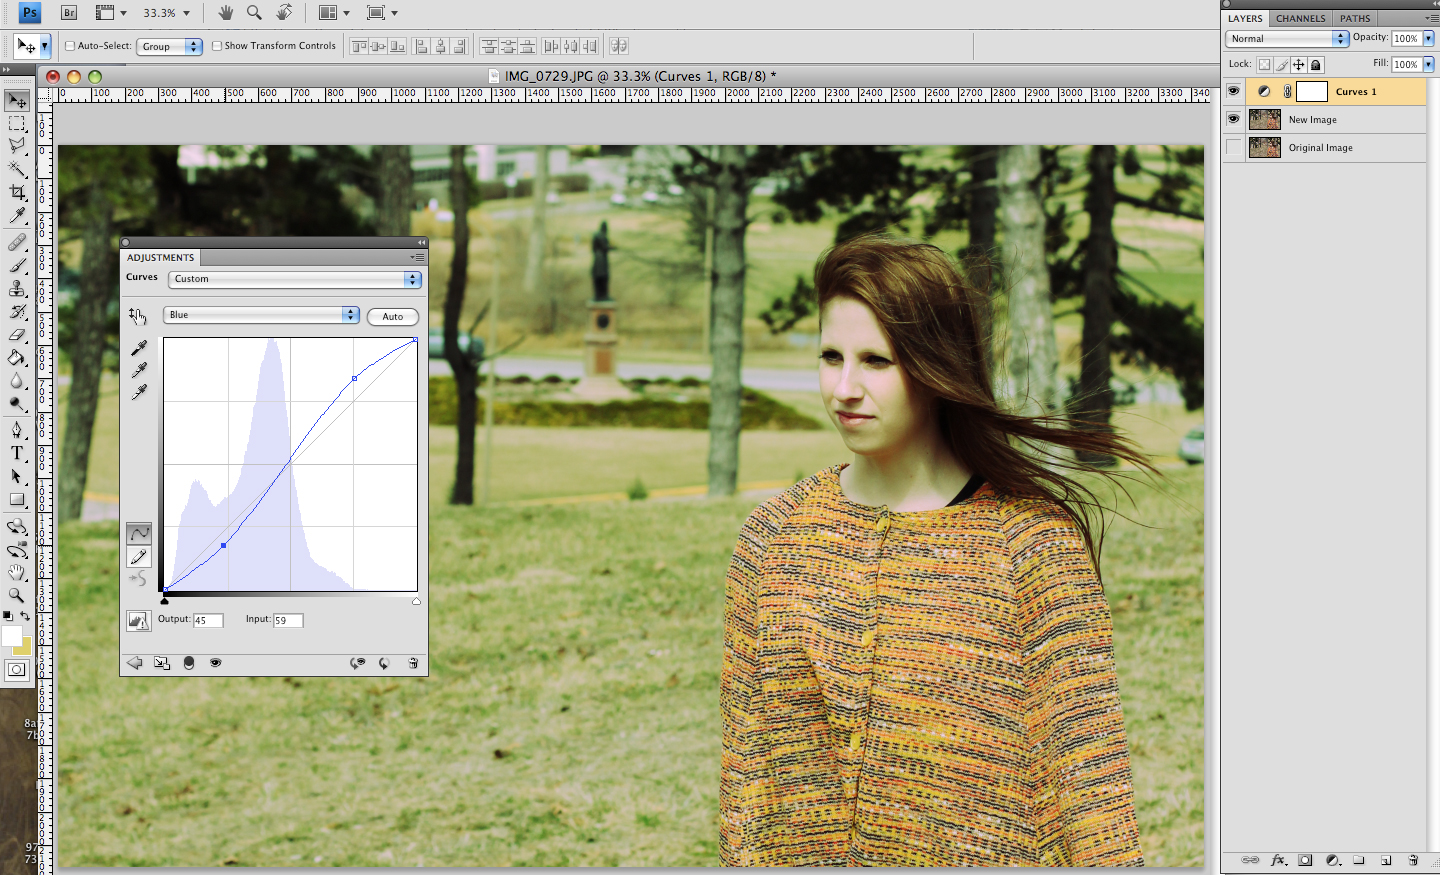
3. In the green channel, add another gentle “S” curve. This will bump up the contrast, especially in the highlights.Next, select the blue channel and drag the curve’s top-right point downward a tad. This will take some blues out of the highlights. Then drag the curve’s bottom-right point up a little.
4. Next, select the blue channel and drag the curve’s top-right point downward a tad. This will take some blues out of the highlights. Then drag the curve’s bottom-right point up a little.
5. Now it’s time for a little fine tuning. Play around with those curves in the different channels to get a look you like. Don’t mess with the combined RGB curve.
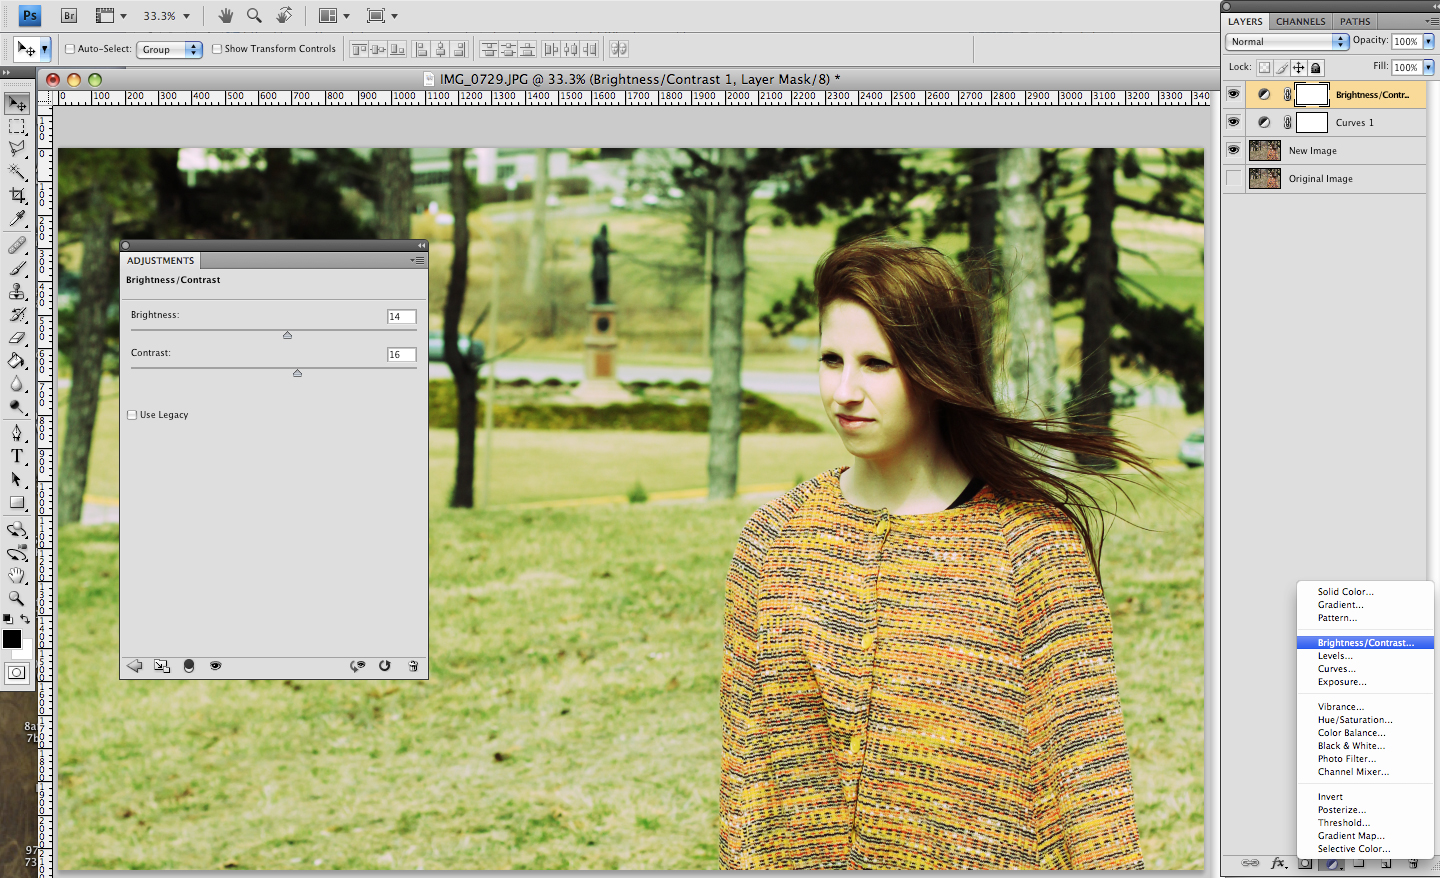
6. In the Layers palette, click the “Create new fill or new adjustment layer” icon and choose Brightness/Contrast. Move the sliders around a little bit until you get the desired contrast.
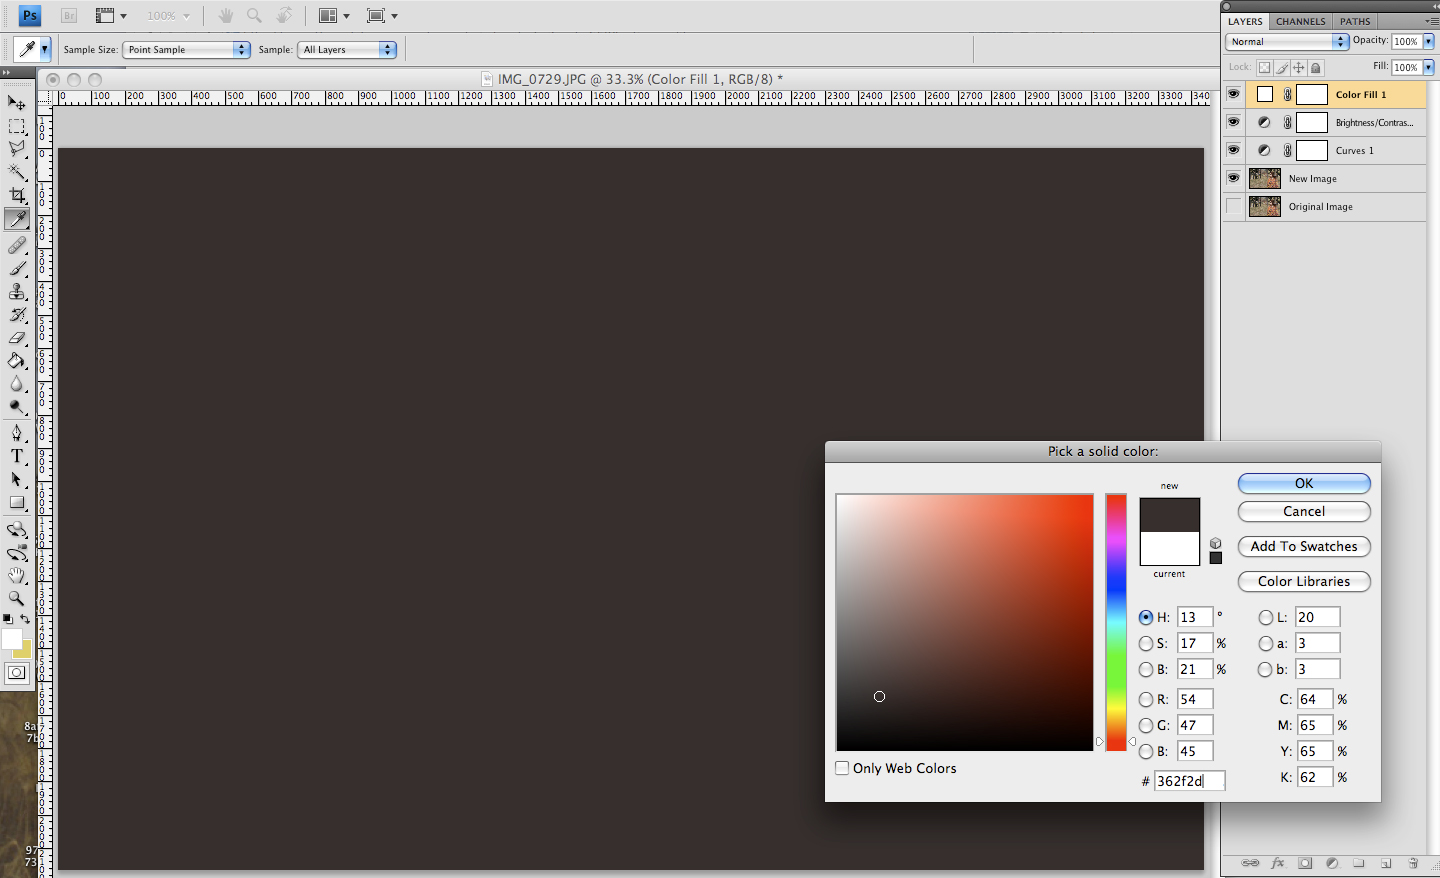
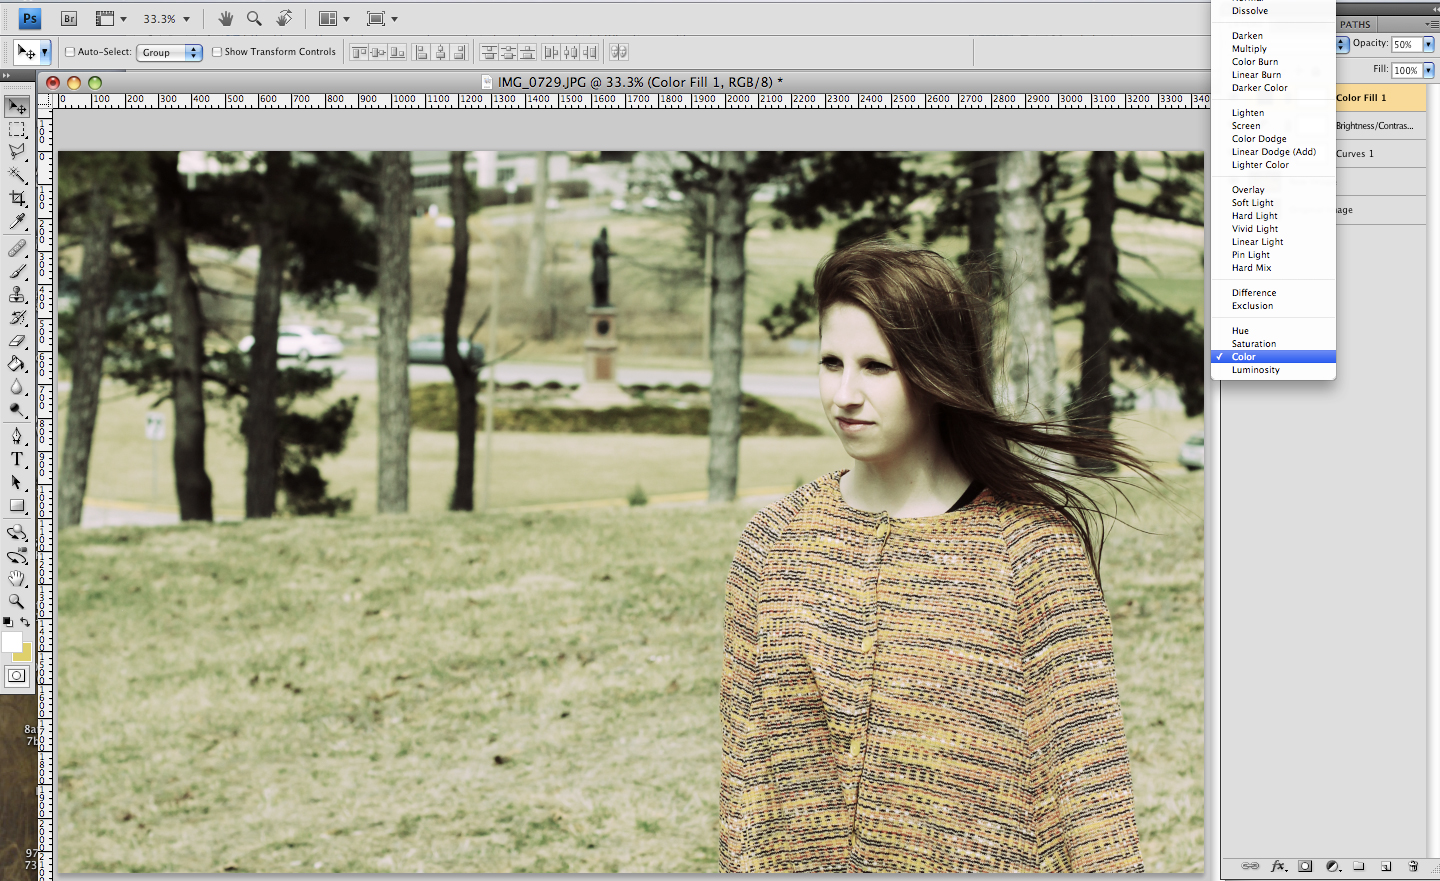
7. I call this the step where all the magic happens. In the Layers palette, click the “Create new fill or new adjustment layer” icon and choose Solid Color. I then choose a dark brown for the color (#362f2d) and turn the opacity down to about %50. Change the layer style to “Color”
8. That’s it. I hope I didn’t lose you in all that mess. It does take some time to get the hang of it, but once you do, you’ll love it. I tend to tweak the process slightly from image to image because no two images are exactly alike. Experimenting with photo to cartoon AI can also bring a creative twist to each one.
Let me know if you have any questions and I can try to help you. I’m no pro at editing photoshop, but I do spend at least 6 hours a day on Photoshop at my day job. We’ve become best friends!


