I seem to have a thing for cute little notebooks, especially if they look like they are one of a kind or handmade. I prefer notebooks that don’t have a bunch of pages because there is something about being able to fill the entire book with your writing that feels like a real accomplishment.
I felt like with this new year I needed a go-to place to write down all things that are related to my blog instead of having little notes here and there. Below is what I did to keep all my inspiration in one place. I went DIY crazy. See below!
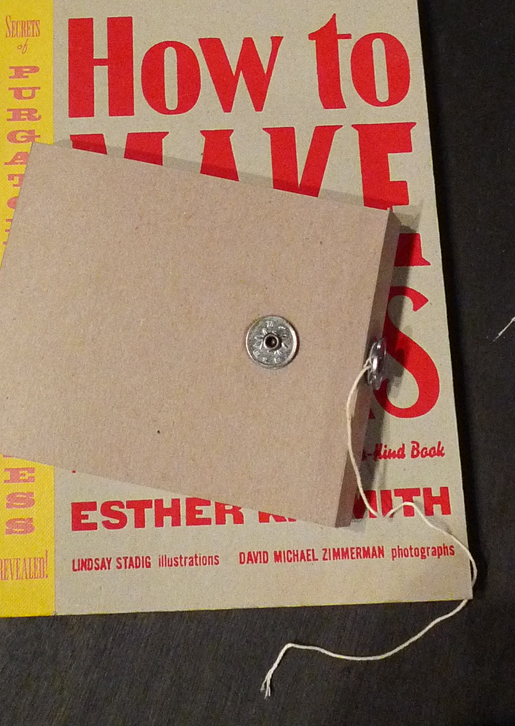
I get a lot of book making ideas from this beautifully put together book called “How to Make Books”, by Esther K Smith. You can get the book at Purgatory Pie Press or Amazon. It was a great gift from my little brother and I’ve referenced it on several occasions.
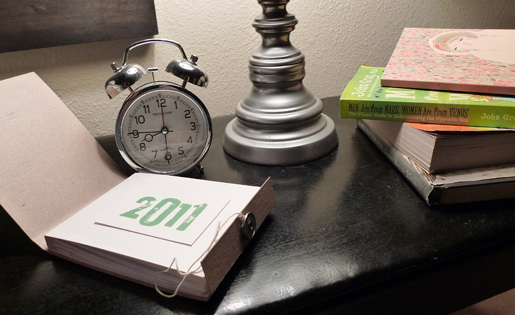
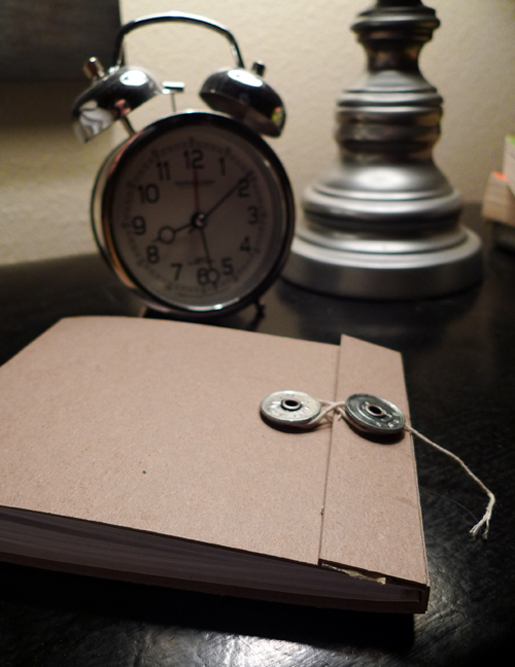
The two above images are of the finished product on my night stand. See all the steps on how to make it below!
WHAT YOU’LL NEED:
– Computer paper
– Any color of card stock ( my sheet is about 12 in long )
– Chip board ( I bought a 24 in long sheet )
– Xacto knife & Scissors
– Elmer’s Glue & Super Glue
– Nylon thread & Needle
– Figure 8 notebook closure
– Ruler
– Self-healing cutting matte
– Bone folder
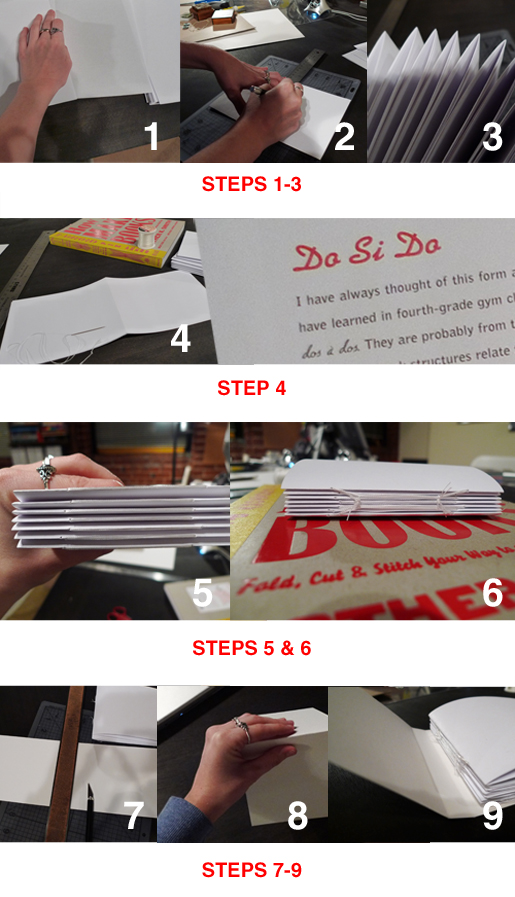
STEPS 1-9
1. Start by folding 8.5in x 11in computer paper in half. I suggest using a bone folder to make the folds perfect. ( You can fold as many pieces as you like. I like notebooks with less pages, so I used about 25 sheets of computer paper. )
2. Then cut those folded sheets in half with an Xacto knife. Make sure you are cutting on the self-healing cutting mat. ( This gave me 50 sheets of paper for my notebook.)
3. Once you have all the pages cut, open them so they are unfolded. Now, cluster 5 sheets together into one bundle with all the fold seems together. ( I ended with 5 clusters)
4. Thread your needle with some thick nylon thread. ( You can use whatever color you’d like.) Sew each cluster together with the “Do-See-Do” method. See Jen Hewett’s blog for a great visual of how to do this. I simplified mine and only did one BIG stitch.
5. Gather all sewn groups together. Stack them on top of each other to create one group.
6. I then sewed all the groups together by looping the thread around all the sewn edges. I did this in two places. I made this part up as I went, so this probably isn’t the most professional method. The key is to get all the individual pieces to be ONE group.
7. I then cut a piece of card stock to be the size of the stack of paper. This is the first “cover/shell” of the book. You’ll need enough card stock to cover the back, seam and front. ( Mine was 5 in front + .5in seam + 5 in back = 10.5in long * all one piece)
8. Score the edges at the seam so you can create a nice fold to go around the stitching. ( This means running the Exacto lighly over the surface, but not cutting completely through)
9. Glue (Elmer’s) the back page of the stack of papers to the back piece of the card stock. ( This will keep the cluster of paper inside the card stock “shell” without falling out.)
STEPS 10-14
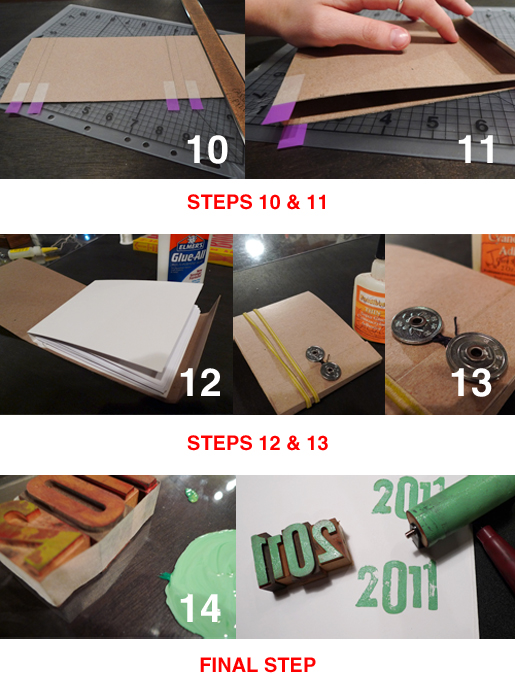
10. Now it’s time for the outside cover/shell. I used chip board because it is sturdy and has a natural look. Chip board is usually a little thicker than card stock. Use the same method as above in step 7 to make the outside cover. Add about .25in to all measurements to make room for the inside material and add an extra inch to make the cover flap. ( Mine was 5.25 in front + 1in flap + .5in seam + 5.25 in back = 12 in long)
11. Repeat step 8 to perfectly fold the cover. Remember to score your edges!
12. Repeat step 9 to attach all the pages and the inside shell to the outside cover/shell. This makes the notebook very study. ( I just used Elmer’s Glue)
13. Attach store bought figure 8 attachments. I found mine in the scrap booking section at my local Hobby Lobby. They usually come with adhesive on the back, but I ended up super glueing them to my book for extra hold.
14. This step is optional. You could be done with step 13, but I really wanted to add a little something to the inside cover. I used some of my wood letterpress letters to print “2011” on the inside cover. This is where you can get really creative and decorate the notebook however you’d like.
That’s it! I hope it wasn’t too complicated. I am horrible at explaining my process to other people, so please leave a comment or email me with questions and I will try my best to answer them.
If you want to get your hands on some inspiration material and step by step how-to kind of stuff, I highly suggest the book mentioned above. “How to Make Books”, by Esther K Smith. Read more about the book at Purgatory Pie Press . Buy the book on amazon.
Once you give it a try, I’d love to see all your lovely creations!


